
How to set up a contractor and authoriser
In this guide we'll run you through adding a contractor and an authoriser to a contract. Once you have completed this task, you will have invited both parties to the system and they will be invited and given a nice user friendly experience that hides any options they don't need and everything should be very straight forward for them.
So, to get you to the appropriate page:
- Navigate to 'Contracts' on the left-hand menu to get to the 'Contract summary' page.
- Either select an existing contract if you are adding a new contractor to an existing contract or click 'Add contract' and follow the instructions for creating a contract.
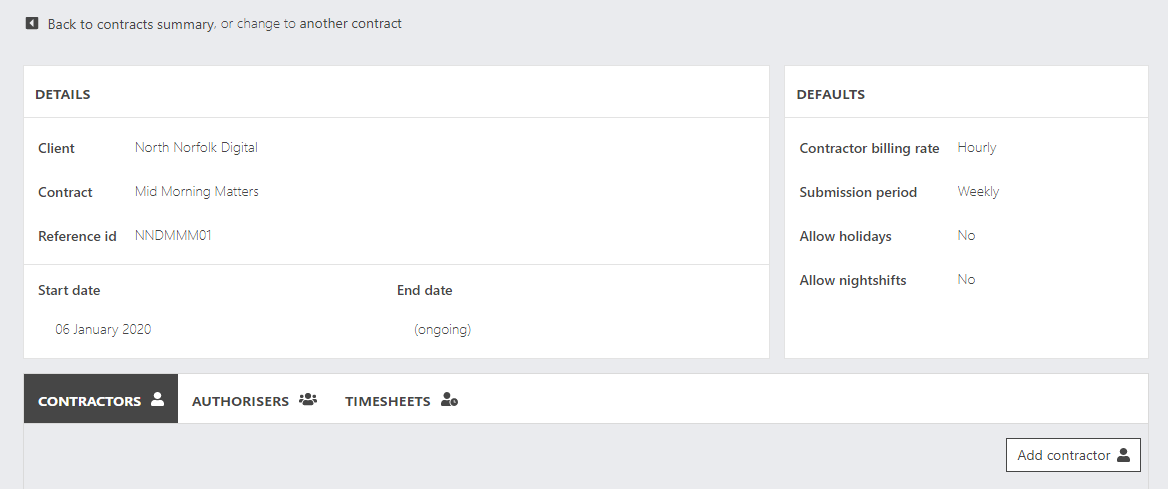
- Once you have done the above, you will be taken to the 'Contract detail' page which is where the video begins.
From the 'Contract detail' page:
- Click 'Add contractor'
- If the contractor is already known to the system, select the contractor from the dropdown. If they are not known, click the '+' icon and enter their details.
- Enter a start and end date
- This cannot be before the start or end date of the contract.
- If you leave the end date blank, it is considered to be an on-going contract or, if the contract has an end date, this will be the last day that a contractor can submit a timesheet for.
- The contractor will not be able to submit any timesheets for dates outside of this date range - this prevents errors or intentional misuse.
- Select whether you would like them to submit timesheets on a weekly or monthly basis.
- Select whether they will be paid on an hourly rate or day rate.
- Enter a payroll number
- This will show up in the spreadsheets that can be downloaded which makes the life of Payroll slightly easier.
- Select if they are allowed to submit time as holiday
- Select whether they will be able to submit time as night shifts
- Choose an authoriser
- If they are already in the system, select them from the dropdown.
- If they are not in the system, click 'Add new authoriser' and follow the instructions.
- Click 'Invite users'.
- Beware! This step sends a branded email invite email to both the contractor and the authoriser.